|
(This essay covers the new big ships. The prerequisite for using these features is that you bought the High Seas expansion.) Content: Buying a ShipThe modern big ships can only be bought from a shipwright at the Sea Market, a floating emporium south of Moonglow and east of Magincia at 64°S 133°W. The old classic vessels can be bought from any shipwright in Britannia. Once you bought a ship you will receive a ship deed. If you use this deed you will be asked in which direction the bow of the ship should face before you can place it into the water. When launching a modern ship, a recall rune will be put into your bank box that allows you to recall back onto your ship at any time. When launching a classic ship, a ship key will be placed into your backpack and your bank box. By recalling onto the key you can get back to your ship. If you dry-dock your ship again you will find a blessed small ship model in your backpack. This ship model can be used to launch your ship again. While runes for modern ships still work after dry-docking and re-launching, you will get new ship keys for classic ships after re-launching. Important:
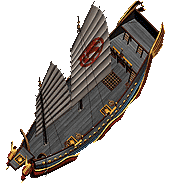
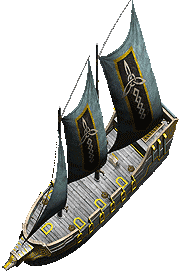
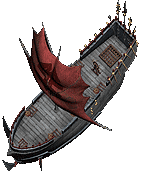
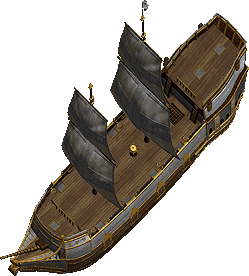
The following types of big ships are available:
If you are standing on a Tokuno Ship you get a +1 skill bonus to fishing.
Orcish Galleon QuestTo get an Orcish Galleon you have to complete several bounty board quests. To get those quests you have to go to G.B. Bigglesby who can be found at the Sea Market, and your ship (new type) has to be anchored nearby. Bigglesby will give you the appointment to go look for certain pirate ships, defeat the pirates, capture the captain and bring him back alive. If you accept the quest, a pirate bindin' pole will appear on your ship. With the pole on your ship you cannot dry-dock it anymore, which means you have to sail to the destination and back. the bindin' pole will vanish again if you turned in the pirate captain or cancel the quest. You also will receive a binding rope which will appear in your backpack. You will need it later to shackle the pirate captain. The pirate ships will be found in the waters east of Jhelom. Just watch your radar map and you will find them easily. You can also use the command "start tracking" and arrows will lead you into the right direction. The pirate ships are Orcish Galleons manned with orcs and a pirate captain. Make sure you attack only ships with a captain on board, otherwise you will waste a lot of ammunition for nothing. Now you have to fire at the pirate ship with your cannons in order to scuttle it. This will take about 10-20 shots with heavy cannonballs (more shots with light cannonballs). Try to avoid being hit by enemy cannons, or your ship may be scuttled too and thus become immobile. Once you scuttled the enemy ship, it will stop moving. Then it is time to kill the orcs and wound the captain so badly that he can be captured. Never ever disarm the captain, or he will become more powerful and heal faster! If you enter the pirate ship, make sure to check its hold and the crates for useful loot. When using the binding rope on the captain, he will be teleported onto your ship and bound to the bindin' pole. It now is time to sail back to the Sea Market and present the captain to Bigglesby. As a reward, you will receive either a special cannon ball or a piece of a ruined ship plan, and sometimes nothing. All people who are in one party with the captain and contributed to the capture of the pirate captain will also have a chance to receive a reward. Once you have all 8 pieces of the ship plan, you can combine them and launch your Orcish Galleon. 
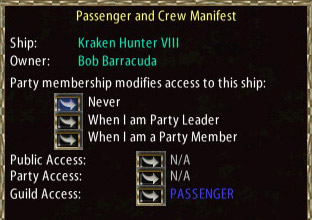
Ship AccessWhereas the old ships can be accessed and used by anyone if unlocked, or anyone who has a key if locked, the new ships do not need to be locked anymore. They have an access system similar to houses:
CannonsFor ship-to-ship battles, cannons are an absolute requirement. You can mount up to 7 cannons on your vessel, depending on the type of your ship. While a Galleon can hold 7 cannons, a Tokuno Ship can only hold 5. One cannon can be mounted on the bow, the rest have to be placed on either side. Cannons have to be crafted by a skilled blacksmith and carpenter. The following types of cannons are available:
Supplies you need to operate a cannon: 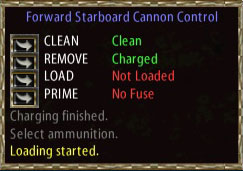
Most of the above items have to be created through a specific crafting process. In the following, the process with the required resources and skills is described: 
Crafting Cannon SuppliesCrafting a Swab
Crafting a Ramrod
Crafting Charcoal (needed to craft black powder)
Crafting Potash (needed to craft fuse cords and match cords)
Crafting Black Powder (needed to craft charges and fuse cords)
Crafting a Charge
Crafting a Cannon Ball
Crafting a Grapeshot
Crafting a Fuse Cord
Crafting Match Cords (needed to craft matches)
Crafting a Match
SummaryTo fire one shot with a cannon you need:
To scuttle a pirate ship you have to fire about 15-20 shots with a heavy cannon. Finding SalpeterBy now you may be aware that the key issue for firing cannons is to get enough salpeter. Salpeter can be bought from an alchemist at the Sea Market. However, the price may be rather high (around 200gp). The alternative way to get salpeter is to find it through mining. If you mine for salpeter, you have to consider the following:
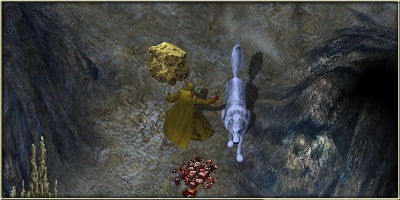
When you mine, eventually a niter deposit will appear beside you. You have to use your mining tool on that depot to extract salpeter from it. The deposits come in different sizes. The biggest one are "gigantic niter deposit". They yield about 200 salpeter each. Size and frequency of finding such a deposit depends on two factors: Location and luck. Mining in dungeon increases the success chance. The higher your luck is, the more frequently you will find deposits and the bigger they will be. With a luck value of 2000 you will find approximately 1000 salpeter per hour in a dungeon. Also consider using Blacksmith Mining Gloves, since they give a bonus to the mining skill even beyond 100. There are dungeons where you can mine safely without having to worry about monsters. Use the Adventurer's Guide to find an appropriate place.
Repairing the Ship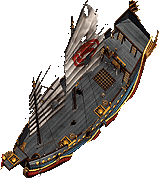
Both classic ships and modern ships can be damaged by cannons. If your ship receives hits, it will go through different damage states, which are even visible at modern ships:
When your ship is severely damaged, your tillerman will inform you that the vessel is scuppered. At this point your ship is immobilized and can be boarded by anyone. The more damaged the ship is, the slower it moves. If your vessel is heavily damaged, it becomes immobile. Since you can only repair it by the shore, you first have to perform emergency repairs. These emergency repairs are temporary and give you 2 minutes to reach the nearest shore at slow speed before they wear out. For emergency repairs you will need 55 yards of cloth and 25 boards. NavigationTo find your way across the waters of Sosoria, you should consider the following:
   
If you double-click the rudder of your boat, you can navigate a vessel by using the mouse. However, if you do so your character is frozen to the ground and cannot move. The basics of ship navigation are still the ship commands.
A more comfortable way to sail to your destination is to plot a course on a map and hand the map over to the tillerman. You can use either sea charts (recommended!) or a map of the world. If you open a map, you can click on "plot course", then click on the map to mark the course. Each pin you stick into the map is a position to which your tillerman will sail. When you're done, hand over the map to the tillerman. If you clear the map afterwards, the tillerman will forget the course. You can then command the tillerman to follow that route:
You can always interrupt the course and speak the normal ship commands, for example when you want to sail around an obstacle. With the "Continue" command, the tillerman will resume the course. 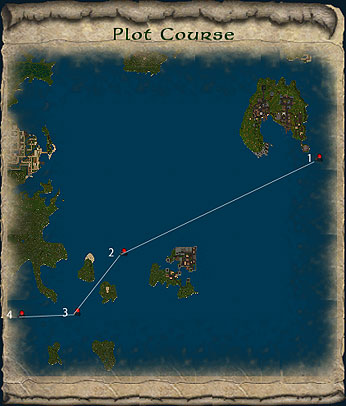
Turbulent Waters!Several server boundaries split up the world of Britannia. Those lines can be seen on UO AutoMap. Whenever you cross such a boundary, your backpack will close and the tillerman will be slightly irritated. Also keep in mind that you cannot plot a course over the east/west server boundary (east of Moonglow). You'd have to plot two courses and sail across the boundary manually. You can also travel to the Lost Lands and back by ship, by finding one of the two Serpent Pillars. One is located west of Jhelom at 145°S, 63°W. The other is located between Trinsic and New Haven at 111°S, 116° E. To pass from Britannia to the Lost Lands, you have to speak the word "Doracron" when you're near the pillar. To pass from the Lost Lands to Britannia, you have to speak "Sueacron". The Serpent Pillars in the Lost Lands are located at 61°N, 47° W in the western sea, and at 36° N, 2° E in the eastern sea. In the Lost Lands you cannot plot a course, but have to sail manually. |
|||||||||||||||||||||||||||||||||||||||||||||||||||||||||||||||||||||||||||||||||||||||||||||||||||||||||||||||||||||


